The more login options, the better: A Keycloak guide
- 7 min read
In 90% of your indie projects, you will need some kind of authentication. But in this day and age, you can’t possibly expect your users to create yet another account with a new password to remember. Instead, its best to offer them a variety of login options, such as Google, GitHub, Microsoft, Apple and so on.
The more login options, the better
The more login options you offer, the easier it is for your users to log in. This is especially true for indie projects, where you want to make the hurdle to sign up as low as possible. If you only offer a username and password login, you will lose a lot of potential users who don’t want to create yet another account.
What is Keycloak?
Keycloak is an open-source identity and access management solution that allows you to secure your applications and services with minimal effort. It provides features like single sign-on (SSO), user federation, identity brokering, and social login, making it a powerful tool for managing user authentication and authorization.
“Why should I use Keycloak instead of Supabase or something like that?”
Well, Keycloak is a self-hosted solution that gives you full control over your authentication and user management. It supports a wide range of identity providers and allows you to customize the login experience to fit your needs. Plus, you can use the same Keycloak instance for multiple projects, making it a scalable solution for indie developers. But the most important reason is that you can switch your tech stack at any time without having to change your authentication solution.
Lets get started
Step 1: Host a Keycloak instance
You can host Keycloak in various ways. If you have a VPS or want to get your hands dirty hosting it yourself, feel free to do so. If you just want to check it out, I recommend you use Docker on your local machine. If you want to host it right away, you can use IndieCloud to host it for you.
Attention: If you want to use “Login via Apple”, you need to additionally install an extension for Keycloak. For more info see “Login via Apple” below. Otherwise use the managed Keycloak on IndieCloud which comes with this extension preinstalled.
Option 1: Via Docker
The most common way is to use Docker. If you have Docker installed, you can start it pretty easily (have a look at the Keycloak documentation for more details).
Option 2: Via IndieCloud
If you are not that familiar with Docker or just want to get started quickly, you can use IndieCloud to host Keycloak for you. Just follow these steps:
If you don’t have an IndieCloud account yet, you can create one here:
- Sign in to IndieCloud with your GitHub or Google account.
- Create a new project
- Create a managed Keycloak app (for more info on how to use IndieCloud, check out our Getting started with IndieCloud guide)
Step 2: Configure Keycloak
Create a Realm
A realm in Keycloak is an isolated space of users, applications, and configurations. There is a default “master” realm out of the box, but i recommend you create a new realm for your project. You can do this by clicking on the “Manage realms” and then “Create realm”.
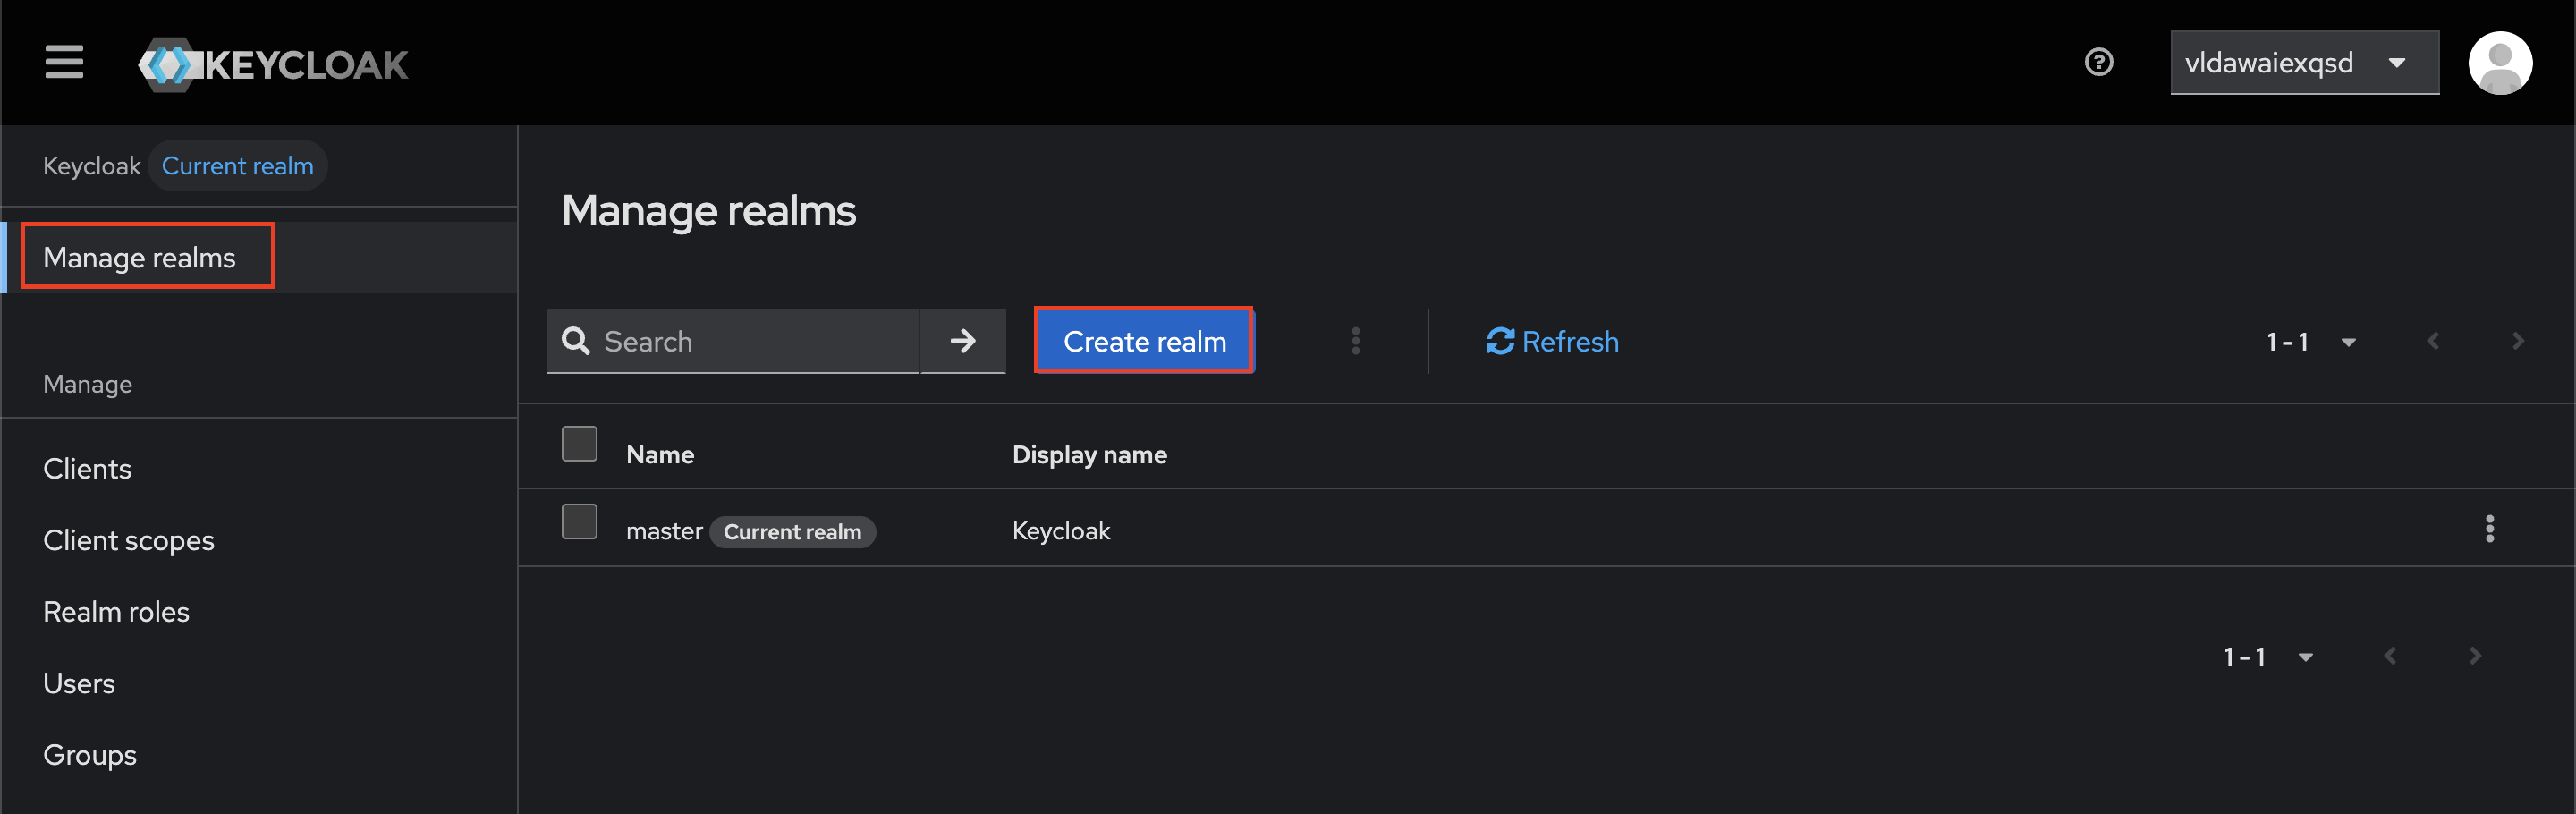
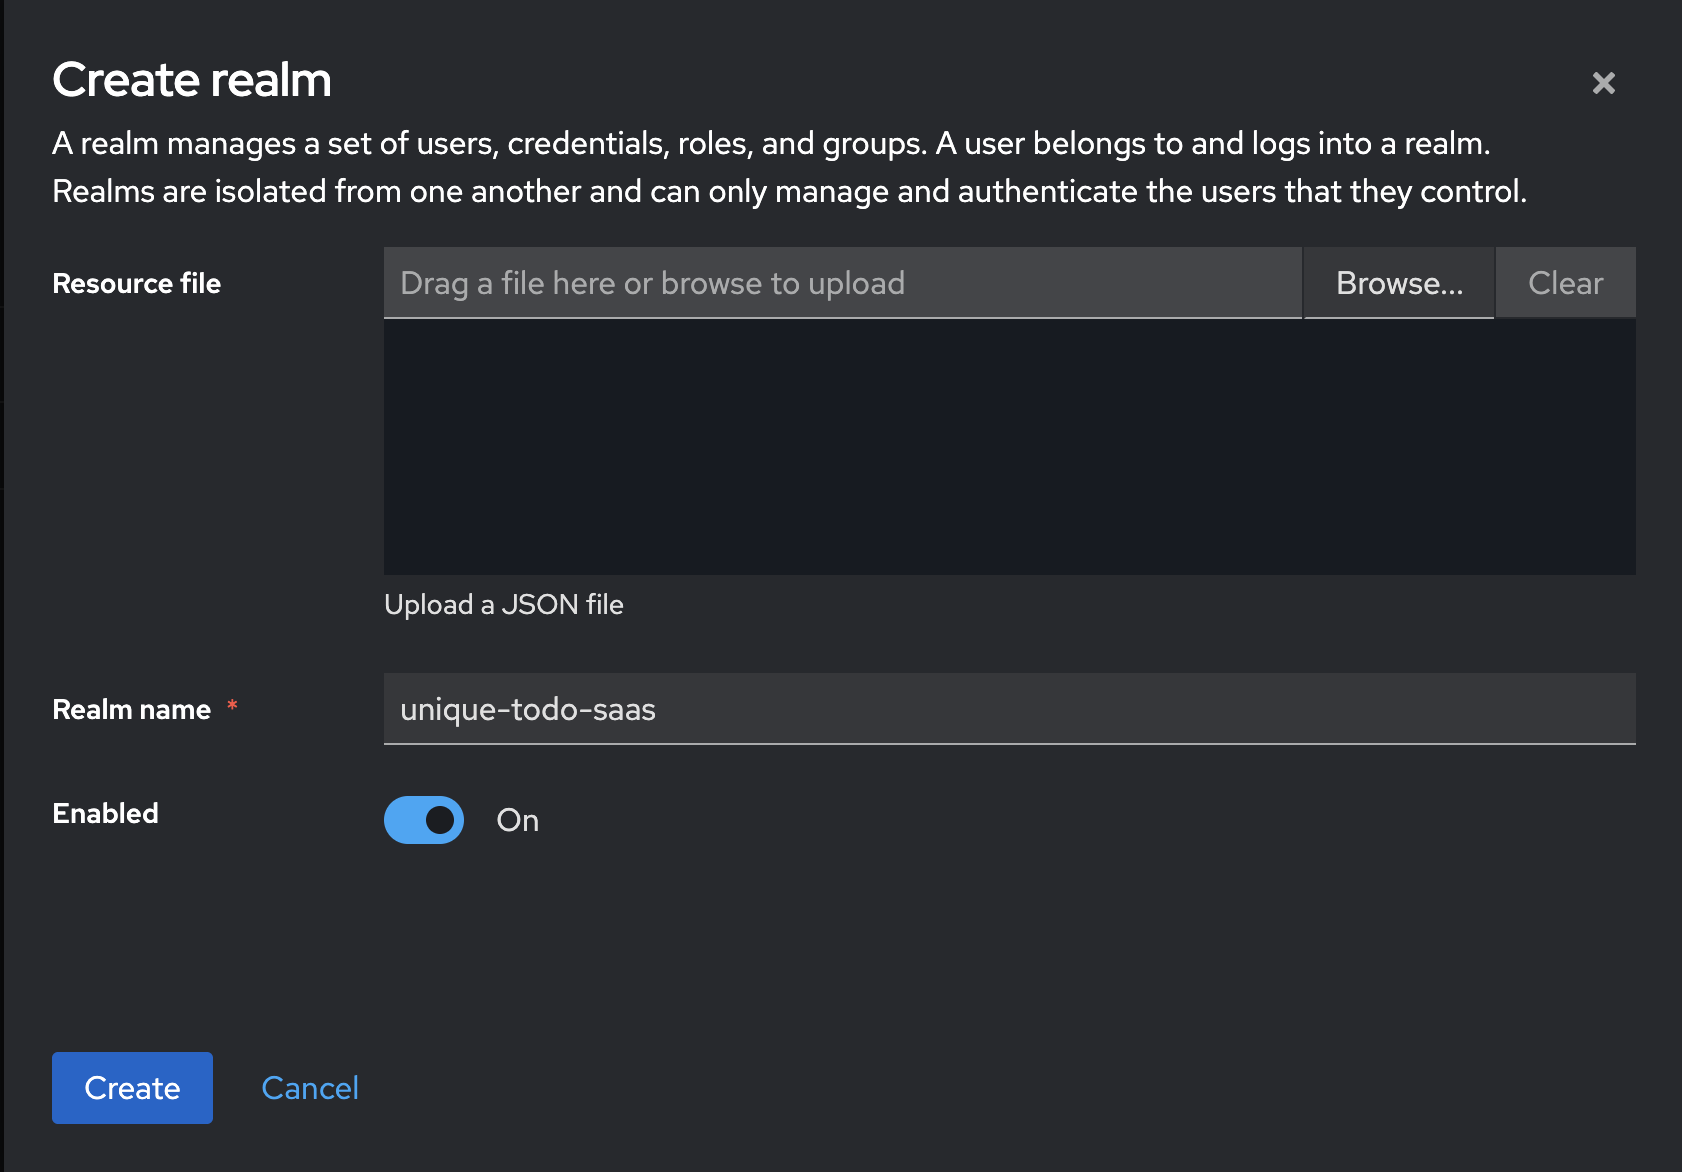
Give your realm a name and click “Create”.
Identity Providers
Now, lets add some identity providers to your realm. An identity provider is a service that allows users to log in to your application using their existing accounts, such as Google, GitHub, or Facebook.
Go to “Identity Providers” in the left menu. You will see a list of available identity providers.
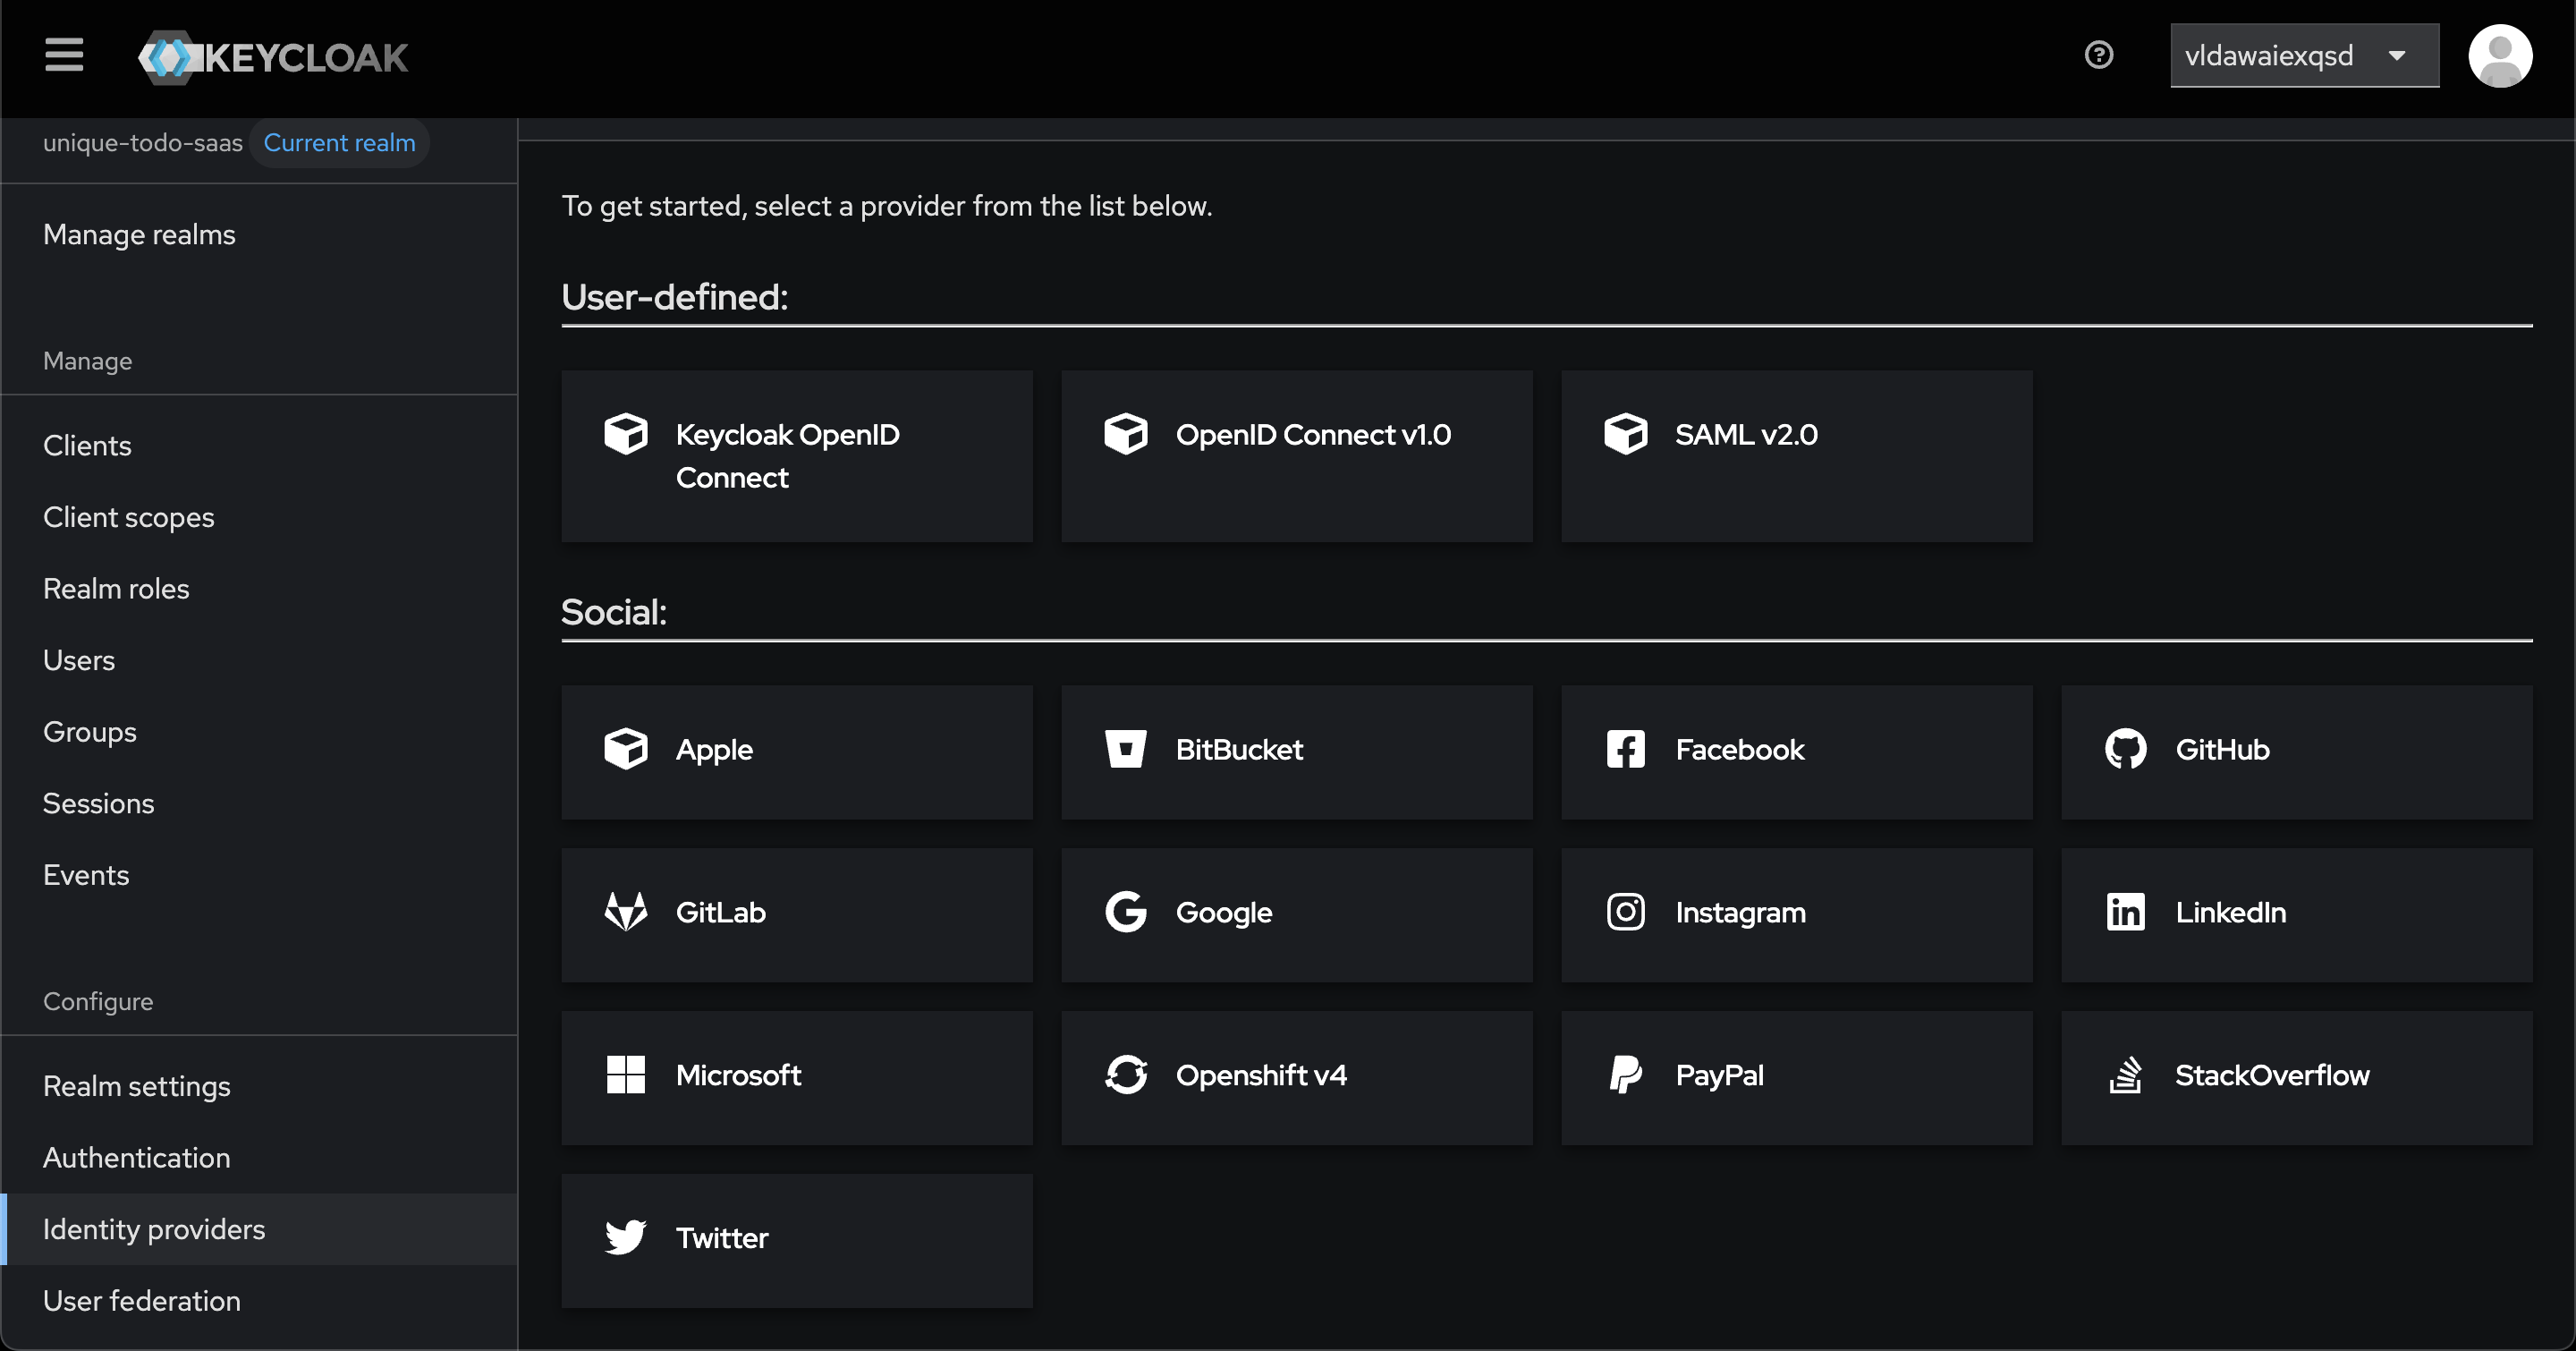
Under “Social” you see the usual suspects like Google, GitHub, Facebook and so on. You can also add other identity providers if they support one of the protocols shown under “User-defined”.
If you have the “Sign in with Apple” extension installed, you will also see “Apple” as an option.
Adding an Identity Provider
To keep this guide short, we’ll only add Google as Identity Provider. The process is similar for other providers.
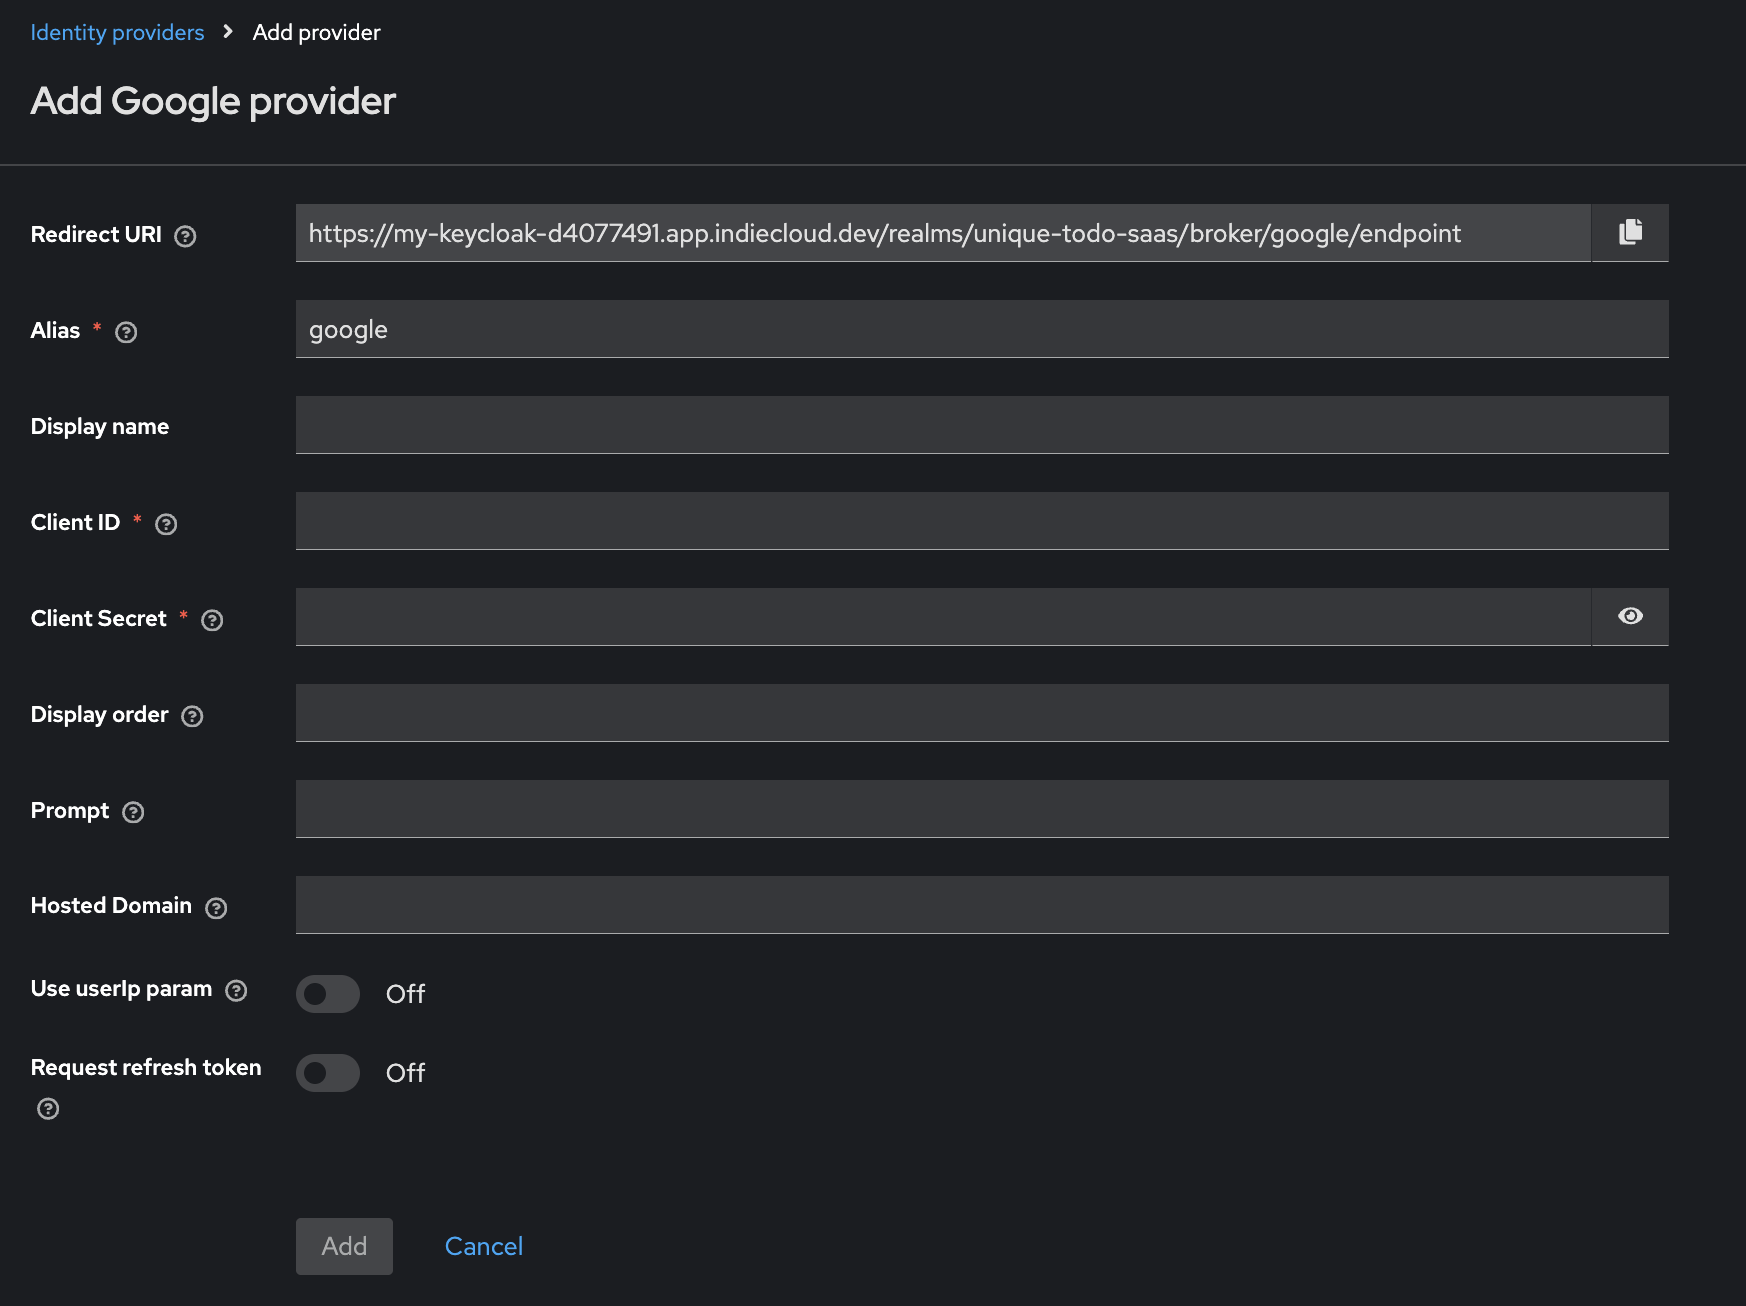
Lets quickly break down the input fields:
- Alias: A unique name for the identity provider. This will be used in your application to refer to this provider.
- Display Name: The name that will be shown to users when they choose this provider to log in.
- Client ID: The client ID you get from the identity provider (Google Cloud Platform in this case) when you register your application with them.
- Client Secret: The client secret you get from the identity provider when you register your application with them. Also provided by Google Cloud Platform.
The rest of the fields can be left empty for now.
To get the Client ID and Client Secret, you need to create an OAuth client at each of the specific identity providers. For Google you can do this in the Google Cloud Console. A documentation of how to create an OAuth client for Google can be found here.
Click “Add” to add the identity provider.
You will see the details page of the identity provider you just added. You now need to copy the redirect URI and set it in the Oauth Client settings of the identity provider portal. This is the URI that the identity provider will redirect to after a successful login.
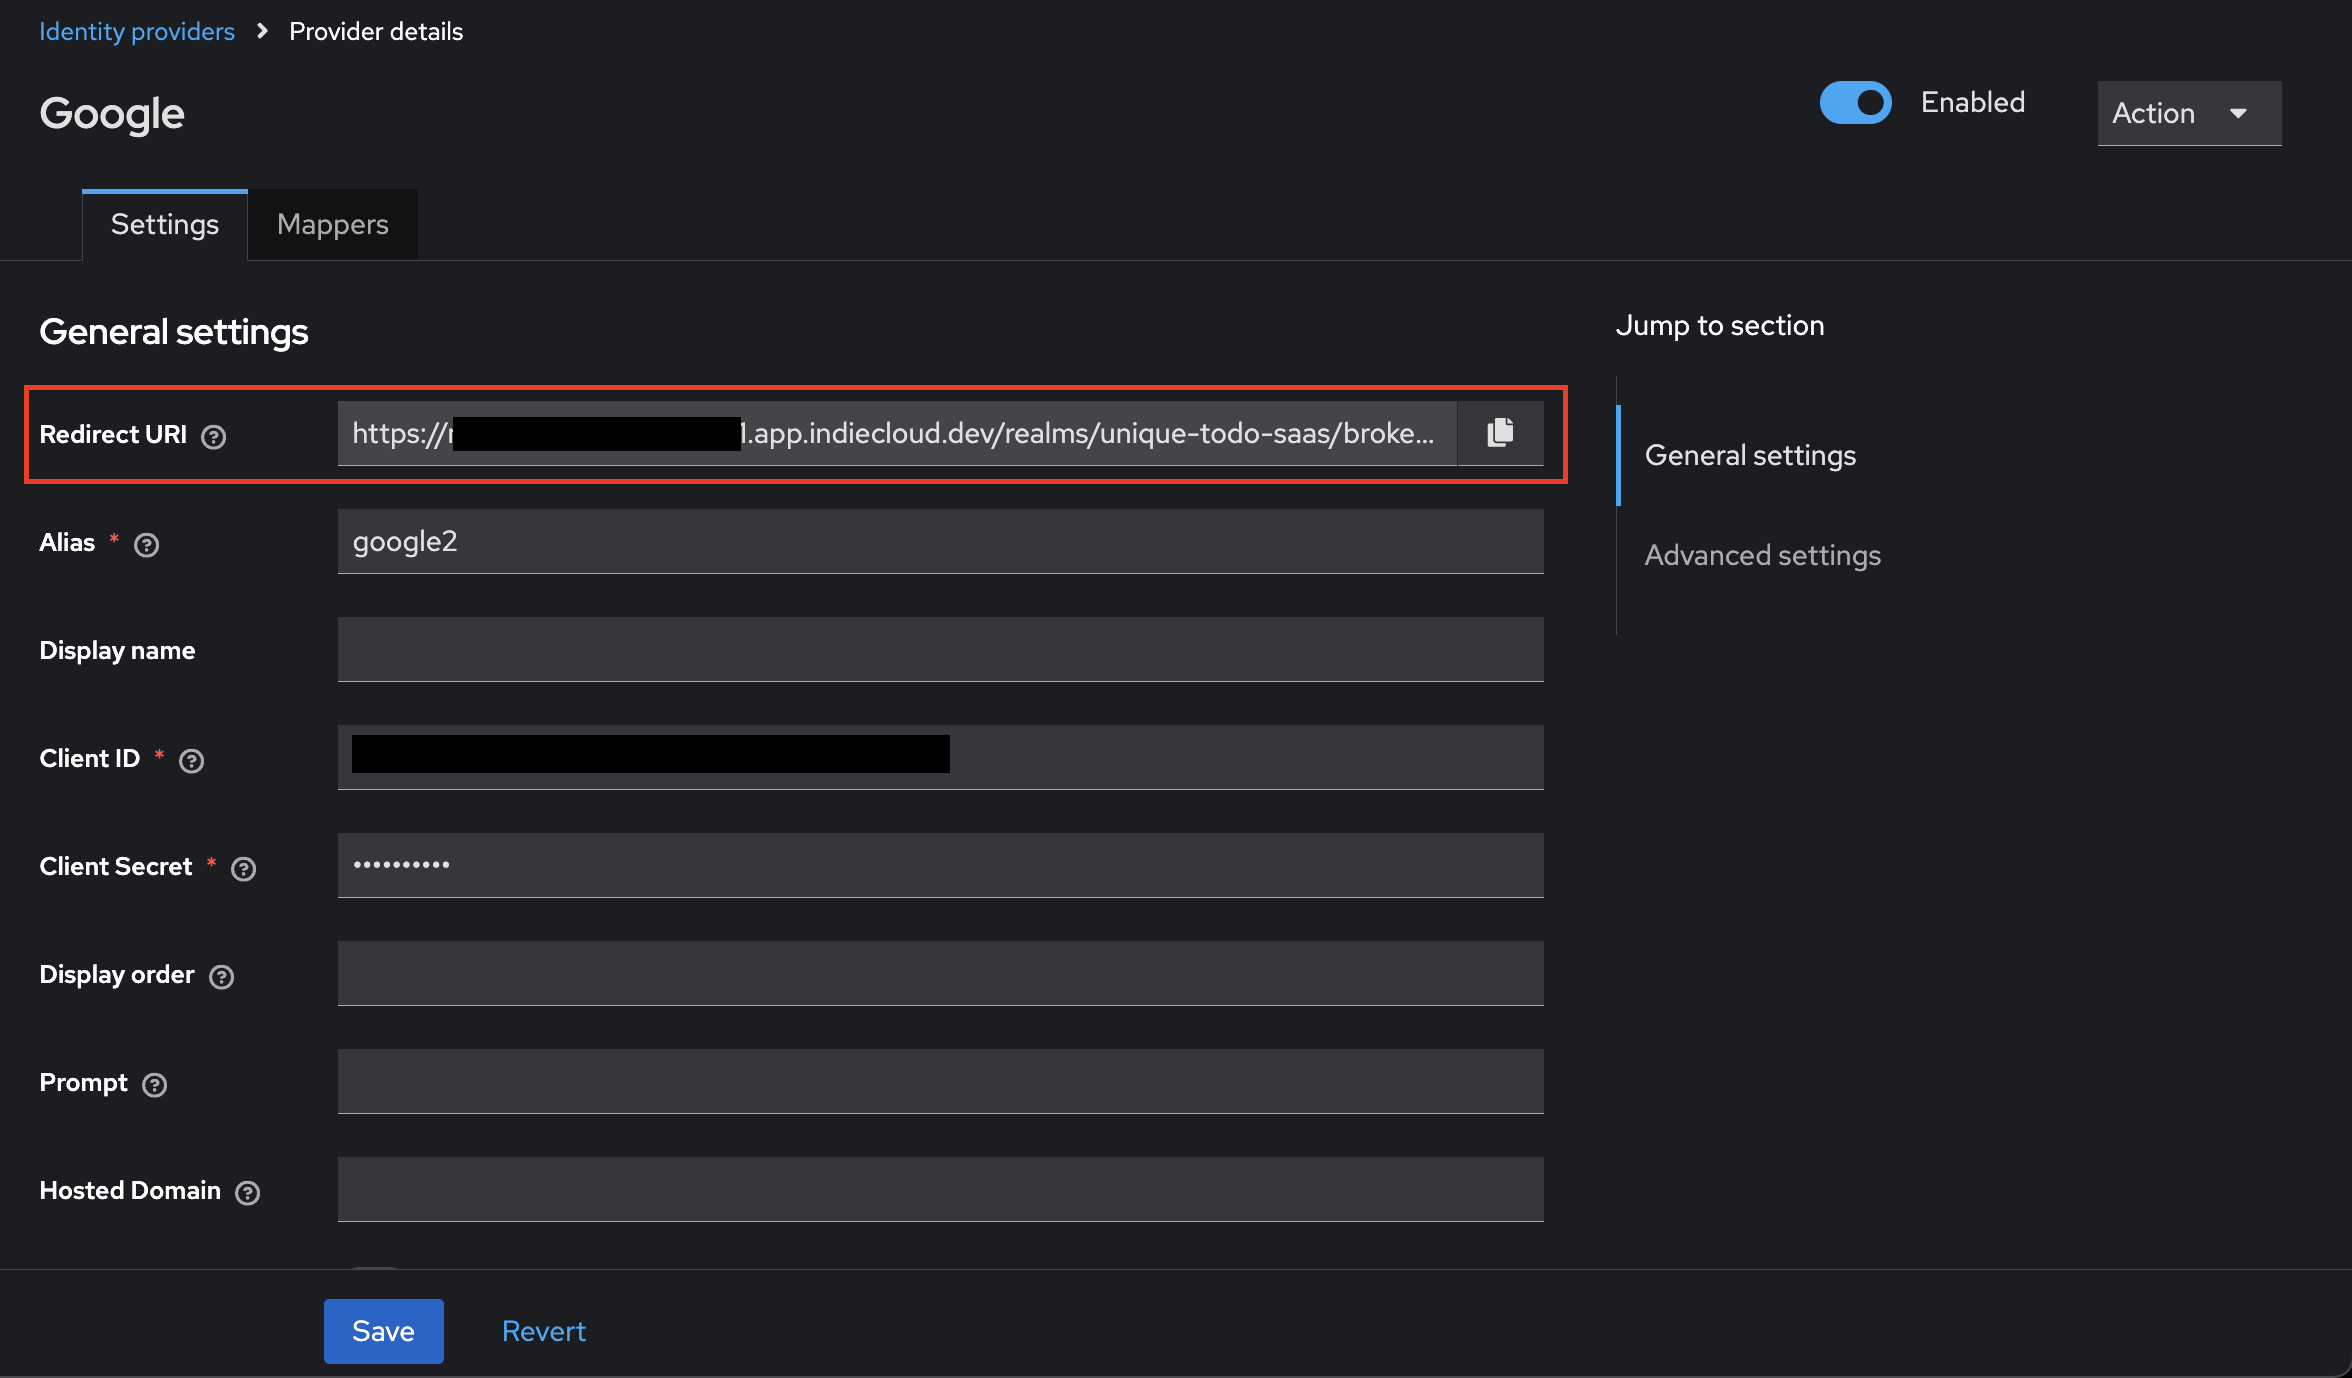
After you have done this, you’re back on the details page, scroll down to “Advanced Settings”. Here are quite some settings how the login flow should look like. For now we leave everything as it is except “Trust Email” which we set to “on”. This will verify the users email address after they have logged in automatically.
Testing time
Now go to “https://[your-domain]/realms/unique-todo-saas/account/” and see if the Login page looks similar to this:
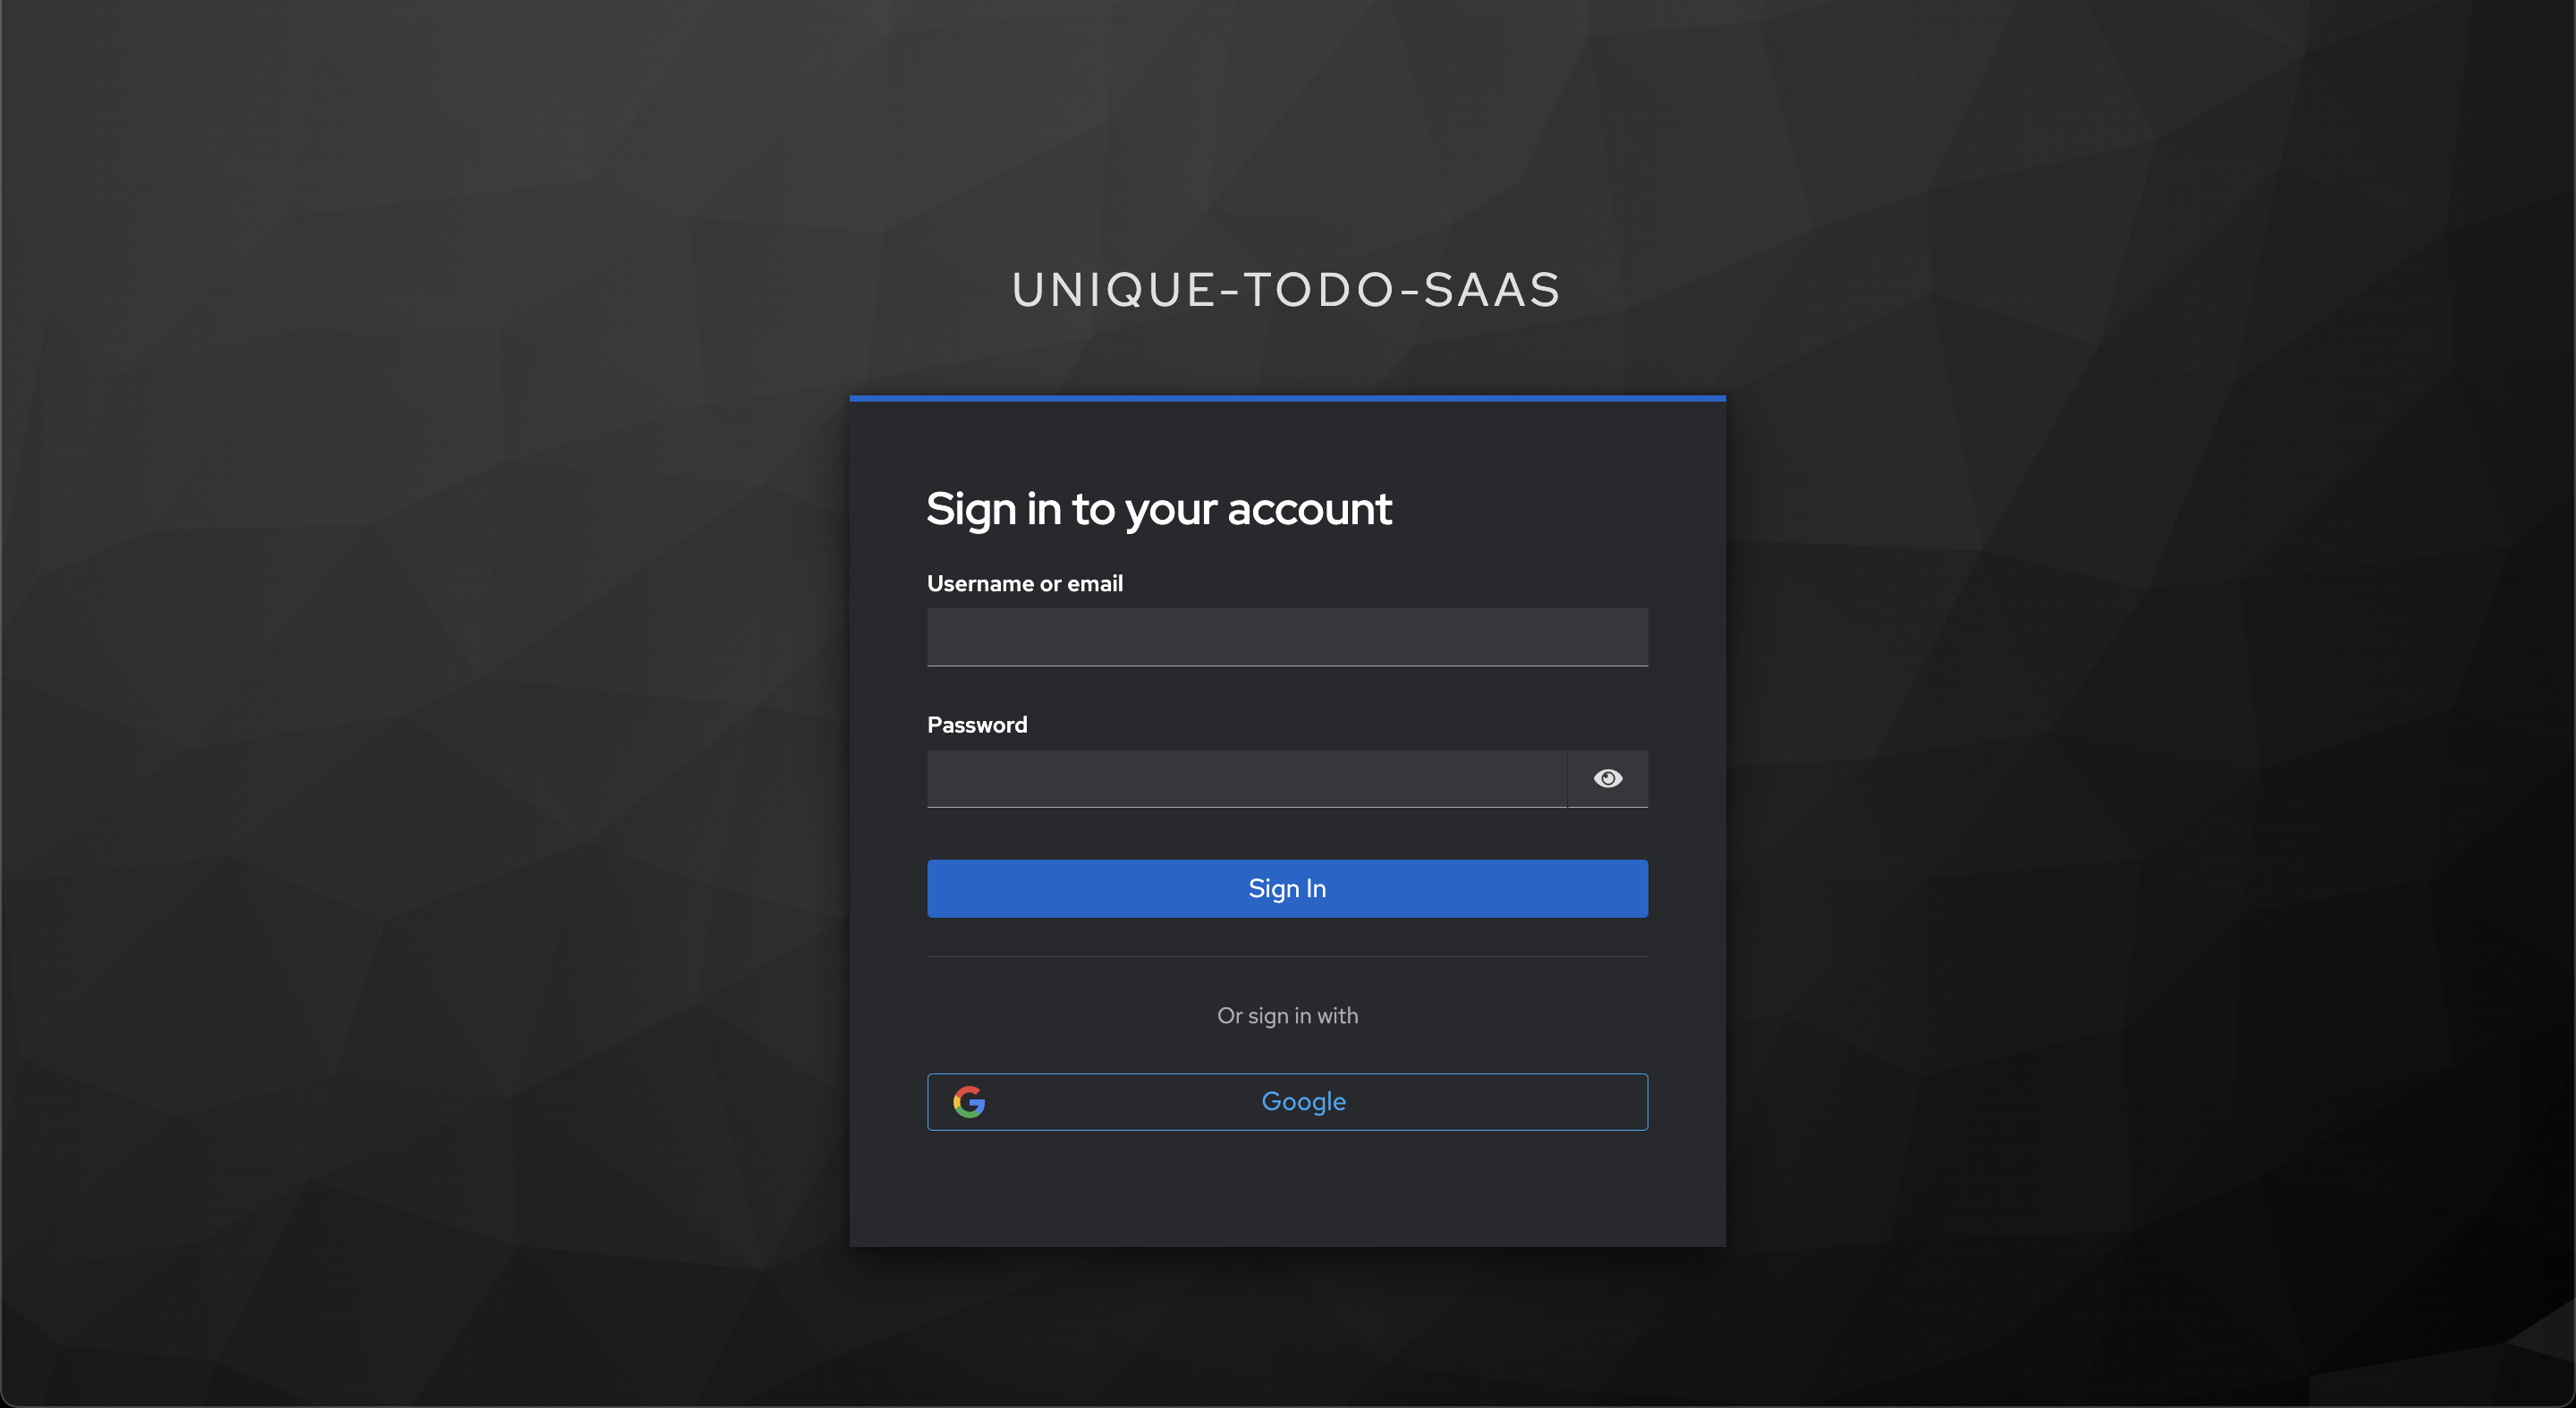
Try to log in with Google. If everything is set up correctly, you should be redirected to the Google login page. After logging in, you will be redirected back to Keycloak and see your user account.
Step 3: Configure your application
Now, you would want to create a “client” in Keycloak, so that your application (e.G. your Angular/React/Vue app) can send the user to Keycloak for authentication and then obtain the access token.
Create a Client
- Go to “Clients” in the left menu and click “Create Client”.
- Set the Client ID to something unique, like “my-app”.
- Click “Next” until you are on “Login settings”
- Set the url of your frontend-app in “Valid Redirect URIs”. This is the URI that Keycloak will redirect to after a successful login. It should look like this:
https://my-app.com/* - Click “Save”
Configure your Frontend App
Now you need to setup your Frontend App to initiate the login flow with Keycloak. There are multiple libraries available for different frameworks, such as keycloak-js for JavaScript. But in general every library that supports Oauth2 and OpenID Connect should work.
The implementation on the frontend is out of scope for this guide. If you would like to see a guide on how to implement the frontend side, please let me know.
Lets imagine the user lands on our frontend-app. You would then check if the user is logged in (has a valid access-token), if not, you redirect the user to Keycloak that includes the Client ID and the redirect URI. This looks something like this:
https://[your-keycloak-domain]/realms/[your-realm]/protocol/openid-connect/auth?client_id=[client-id]&redirect_uri=https://[your-frontend-app-domain]/&response_type=code
Note: In older Keycloak versions, the URL might look slightly different. If you are using a newer version, it should look like the one above.
Test it
Now, paste the URL above into your browser (with the actual values instead of the placeholders of course…) and you should be redirected to the Keycloak login page. After logging in, you will be redirected back to your frontend app with an access token in the URL. The redirect URI should look like this:
https://[your-frontend-app-domain]/?session_state=a59cc6dc-dc59-4fc4-9a34-2e423ec2da0b&iss=https%3A%2F%2F[your-keycloak-domain]%2Frealms%2F[your-realm]&code=db6b789c-e786-471d-8e27-0e73b0d84a28.a59cc6dc-dc59-4fc4-9a34-2e423ec2da0b.4aa8ab9c-1497-4a50-a8db-76e0d7981cb2
With the redirect URI, your library should be able to exchange the code for an access token. This access token can then be used to authenticate requests to your backend API.
Thats it!
Congratulations! You have successfully set up Keycloak with Google as an identity provider and configured your application to use it for authentication. You can now add more identity providers, such as GitHub, Facebook, or Apple, by following the same steps as above.
Where to go from here?
In case you want to dig deeper into topics around Keycloak and authentication, here are some resources you might find helpful:
Thanks for reading!
I hope this guide was helpful. If you have any questions or feedback, feel free to reach out to me via email or Discord (see below). I would love to hear from you!
Got problems, questions or feedback?
If you have any questions or need help, feel free to reach out to me